November 12, 2012

Happy Diwali (Deepavali)!

The Diwali (Deepavali in South India) celebration is all about the triumph of good over evil, light over darkness, pluses over minuses... you get the picture! The original Sanskrit word, Deepavali, translates directly into "row of lights." Hence, it has come to be known around the world as the Festival of Lights, a five-day celebration of Hindu faith.

The third day of the festival is the actual Diwali holiday (this year, it's November 13), when Hindu followers pray to the goddess Lakshmi, goddess of beauty, wealth, and wisdom. They pay tribute to her by lighting oil lamps at night all around their homes, hanging colorful lanterns and lights, and shooting fireworks. And what's a religious holiday without sharing some fabulous food with family and friends? In that respect, Diwali for Hindu families is no different than Easter and Christmas for Christian ones. Growing up in southern Missouri didn't offer us many opportunities as a family to get some real Diwali celebrations going like my parents probably would have preferred, but I enjoyed becoming more involved with it in the more diverse communities I lived in as I got older. My college town, Columbia, Mo., was home to a wonderful Indian community that hosted numerous events on my college campus. Here in Chicago, my husband and I enjoy a lively Indian cultural scene, including many traditional bharatanatyam dance performances throughout the year and boasting some of the best Indian restaurants in the country. Our first date was at Hema's Kitchen, a traditional North Indian fare BYOB, nearly 6 years ago. On occasion, we like to track down Hema herself at her second location in Lincoln Park, where we dined that telltale day, and remind her of how the aromatics in her fine food aligned our stars!

This year though, I started celebrating a day early with last night's Honey-Pepper-Glazed Lamb Chops with Blue Jalapeño Cornbread. It's a bit off the traditional Indian food mark, thanks to so many years of being influenced by all the other food cultures in the United States. You can make your own marinade for the lamb chops here, or pick up some Bollywood Sprinkle from my Web site and substitute that for the spice mixture. Blue cornmeal is so unique and much more flavorful than plain yellow. You can find it in most baking aisles in the Bob's Red Mill section.

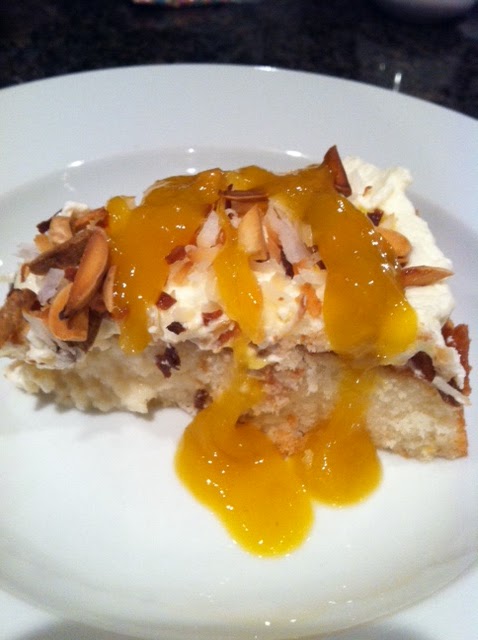
As for dessert, I highly recommend something with chai or pistachio. This entry from 2010, Chai Chocolate Chip Cookies, goes perfectly with this fusion meal. Dunk a few in some chai tea after dinner, and you'll be transported to Mumbai in moments. Now, go fire up some lamps and lanterns, and celebrate the lightness in your life!

Honey-Pepper Glazed Lamb Chops

4 good-size lamb shoulder chops (about 2 lbs total), fat trimmed and patted dry
1/2 teaspoon salt
1/2 teaspoon cumin
1/2 teaspoon garam masala
1/2 teaspoon garlic powder
1/4 teaspoon freshly ground black pepper
2 tablespoons honey
2 tablespoons grapeseed oil

Place the lamb chops on a plate in a single layer. Combine the first five ingredients (salt through pepper) in a small bowl and sprinkle on both sides of each lamb chop. Place inside zippered plastic bag, and drizzle in honey and oil. (If using Bollywood Sprinkle, omit honey.) Seal bag tightly and shake to spread mixture evenly over chops. Set aside for 30 minutes.

Heat a grill pan on high, coat with cooking spray, and grill chops 6 minutes each side for medium/medium well; 4 minutes each side for medium rare. Serve with sour cream mixed with horseradish, basil pesto, and harissa (1/4 cup sour cream, 1 tsp horseradish, 1 tsp basil pesto, 1/2 tsp harissa). Serves 4.

Blue Jalapeno Cornbread 

1 cup unbleached all-purpose flour
1 cup blue cornmeal (Bob’s Red Mill)
1/2 teaspoon baking powder
1/2 teaspoon baking soda
1/2 teaspoon salt
1/4 cup honey
3/4 cup buttermilk, room temperature
5 tablespoons butter, melted
2 large eggs, room temperature
3/4 cup frozen corn kernels, rinsed and drained
1 jalapeno, seeded and finely chopped
1/4 cup pepitas, toasted

Preheat oven to 350°F. Spray a 9˝ round baking pan with cooking spray, line with parchment, and spray again. Set aside. Combine flour, cornmeal, baking powder and soda, and salt in a large bowl. Stir with whisk and make a well in the center. In a separate bowl, whisk together honey, buttermilk, butter, and eggs. Pour into well in flour mixture and mix well. Fold in corn and jalapeno. Pour into prepared pan and sprinkle pepitas on top. Bake for 20-25 minutes or until toothpick inserted comes clean. Allow to cool 10 minutes and slice into wedges. Serves 8.


October 30, 2012

Spooky Spider Cake, Nutella Edition!

All hallows eve... A time for pumpkin carving, costume making, and as usual around here, cake making. I've got a thing for spiders this year, having so far made them using chocolate M&Ms (using sprinkles for tiny spider feet on M&Ms as cupcake toppers or on cookies with royal icing feet) and with buttercream, randomly planted all over this tasty Nutella-inspired cake.

I found the original recipe for an awesome marble cake complete with chocolate ganache spiders on the Cooking Channel's site. However, the original seems to be rather complicated and requires three pages of directions to execute. I simplified it pretty dramatically below, and I even introduced more Nutella into the cake portion of the recipe (the original only calls for it in the frosting). Let me just say, this Nutella fudge frosting may perhaps be my new favorite cake topping. Let's just admit it: Nutella in anything improves things tenfold! Put it in cake and frosting, and well, you'll be in cake coma in no time!

So what is the deal with Nutella? This site provides the complete lowdown on Nutella. Created by Italian pastry maker Pietro Ferraro using hazelnuts to compensate for a cocoa shortage due to World War II food rationing in Italy, it didn't actually make it onto the food scene in the United States until the early 1980s. And as many things go in the world of food, it has since garnered its own day of celebration, World Nutella Day, February 5. I'll put a reminder into my calendar now to give you all another recipe for celebrating this February!

In the meantime, enjoy making this Nutella marble cake this Halloween and share it with the spooky spiders in your life!

Nutella Marble Cake

2 1/4 cups (7.25 ounces) cake flour, sifted
2 teaspoons baking powder
1 teaspoon baking soda
1/4 teaspoon salt
1/2 cup (1 stick or 4 ounces) unsalted butter, room temperature
1 1/4 cups granulated cane sugar
2 large eggs, room temperature
3/4 cup light sour cream, room temperature
1 1/2 teaspoons vanilla extract
1/2 cup milk, room temperature
3 tablespoons Nutella
3 tablespoons unsweetened cocoa (baking cocoa, not hot cocoa mix)

Nutella Fudge Frosting

1 cup (8 ounces) egg whites (from about 8 large eggs)
2 cups granulated white sugar
1 1/2 lbs (6 sticks) unsalted butter, room temperature, cut into tablespoon-size chunks
pinch of salt
1/2 cup Nutella
4 ounces bittersweet chocolate (65% cacao), melted and cooled
1 teaspoon vanilla extract
Black gel food coloring

For the cake: Preheat oven to 350°F. Spray three 8-inch round cake pans with baking spray (preferably with flour). Line with parchment and spray again. Set aside.

Sift together flour, baking powder, baking soda, and salt in a medium bowl. In the bowl of a stand mixer fitted with a paddle attachment or a large mixing bowl, place butter and sugar. Beat until fluffy, about 5 minutes. Add eggs one at a time and mix well after each addition. Add sour cream and vanilla and mix until combined.

Add flour mixture alternately with milk in three batches. Split the batter in half and sift cocoa powder over half. Add Nutella to cocoa powder half and mix well. Alternate scoops of vanilla batter and Nutella batter to cake rounds until completely divided evenly among the pans. Drag a butter knife or small rubber spatula thru batters until marblelized. Bake 25-30 minutes or until toothpick or skewer inserted comes clean. Allow to cool on racks for 10 minutes, then remove from pans and cool on racks completely.

For the frosting: In the top portion of a double boiler or the bowl of a stand mixer, combine egg whites and sugar. Mixture will be grainy. Turn up heat on pan with water to medium-high and place bowl with egg white mixture on top. Whisk constantly until mixture reaches 160°F on a candy or probe thermometer. (Do not leave unattended or egg whites will cook!) Remove bowl from heat and beat on high until stiff shiny peaks, about 7 minutes. Make sure the bowl has cooled off significantly before adding the butter. Lower speed and add butter in tablespoon-size chunks, mixing well after every 2-3 tablespoons. Add salt and vanilla and mix well. Remove from mixer and fold in Nutella and cooled melted chocolate.

Assembly: Place cooled cake round on 10" coated cardboard cake circle. Frost top of round with Nutella Fudge Frosting. Repeat with remaining layers and frost top and sides with one crumb coat. Refrigerate 15 minutes and apply final outer layer of frosting. Pipe border with Nutella Fudge Frusting. Tint a half cup of frosting black using gel food color. Pipe spiderweb and spiders as shown. Serves 12-14. Store in an airtight container in refrigerator for up to 3 days.

Note: The above frosting recipe begins with a standard Swiss meringue buttercream. If you stop before adding the Nutella and melted chocolate, you have a basic vanilla buttercream. For a white chocolate buttercream, add 4 ounces cooled melted white chocolate. For a chocolate buttercream, add 4 ounces cooled melted dark chocolate and 3 tablespoons cocoa (sift over buttercream before mixing in).


August 5, 2012

Summer on the Rocks

Seems like the dog days of summer are when you really start getting creative with your drink. Worn down from patio parties with spiked lemonade, after-work beer garden boredom, and a plethora of picnics in the park with sparkling wine or rosé, you might be ready for some real on-the-rocks creativity.

Whiskey cocktails are no longer nouveau, I know. They seem so last season these days, but mix them with beer and in-season fruit, and you have a whole new concoction. That's what this first recipe does, with rye whiskey, IPA, and peaches. The Summit Solstice, adapted from a recipe created by Sean Marron, the wine director at The Farm in Park City, UT, is a refreshing and light beer-whiskey cocktail. White tea in a complimentary flavor may be hard to come by, but it's worth looking for if you want to make a serious Summit Solstice. I used Revolution brand white pear tea, which I found in a specialty foods store on Chicago's famed Magnificent Mile. You can purchase it online here, and it is well worth the shipping cost, even for when you just want a cuppa tea later this winter. As for a good rye whiskey, I recommend Templeton, FEW, or Whipper Snapper. The original recipe calls for a bourbon-rye blend, but rye on its own will do the trick. If you want to be able to make this drink year-around, when peaches aren't in season, indulge in a little white peach purée from Perfect Puree. You can keep it frozen and thaw what you need. And lastly, I know these hot days can suss you up plenty, so if you need to cut the alcohol a bit, dilute with sparkling water or club soda.

I've also included a white peach sangria recipe, that was a huge hit at my last book club gathering, with both the gentlemen and the ladies, surprisingly. Traditional red sangria is often anyone's toast for tapas on the town, but white or blush drinks in general, namely white wines and champagnes, tend to be favorites of the females in any crowd. This recipe is derived from one I used long ago, when I began throwing dinner parties fresh out of grad school at my very first home in St. Louis. Multiple moves and too many donations to libraries later, I can't find the cookbook from which I originally gleaned it. So I made this up that evening with my book club, and to my relief, it went over very well! You can also substitute white grape juice or pear nectar, as white cranberry peach juice can also sometimes be hard to find, especially sans high fructose corn syrup and other additives. However, it's well worth searching for. The drink is perfection in a rocks glass. Happy final days of summering!

Summit Solstice (adapted from The Farm)

2 teaspoons diced fresh peaches or thawed peach purée
6 mint leaves
3 ounces bourbon or rye whiskey
1 ounce white tea syrup*
2 ounce IPA or Domaine DuPage French Country Ale (my personal favorite)
peach slices for garnish

Fill two rocks glasses with ice and set aside. Combine the peaches or purée and mint leaves in a mixing glass and muddle well. Add whiskey and white tea syrup and shake. Strain evenly into rocks glasses and top with beer. Garnish with peach slices and serve. Serves 2.

*For the White Tea Syrup: Steep four (4) bags Revolution White Pear Tea in 12 ounces boiling water for 1 hour. Remove tea bags and add 10 ounces powdered sugar. Whisk to dissolve. Seal extra tea syrup tightly in a bottle or jar and store in a cool, dry place.

White Peach Sangria

1/2 cup Triple Sec, Cointreau, or other orange-flavored liqueur
1/2 cup brandy
1 750-ml bottle Cupcake Prosecco
1 regular-size bottle Ocean Spray White Cran-Peach Juice Drink
1 peach, pitted and chopped
1/2 cup seedless white grapes
handful of fresh cranberries
1 lemon seeded and sliced

This recipe feeds a crowd, so set up two equivalent-size pitchers and split everything equally between the two. Place 1/4 cup orange liqueur and 1/4 cup brandy in each pitcher, then split the bottle of Prosecco and juice drink evenly between the two pitchers. Float the fruit in equal amounts on top and keep chilled until serving. Fill wine glasses with ice and serve. Serves 12-16.


July 19, 2012

Tres (Leches) Bien!

If you've never tried tres leches cake, then you're missing one of the most caketastic experiences out there! My favorite place around town to enjoy this delectable south-of-the-border treat is at Depot Nuevo in oddly enough, Wilmette, Ill. After years of living on Chicago's West Side and frequenting plenty of taquerias and Mexican food joints, I'm surprised I found the sweetest of all sponges here on the North Shore.

Soaked so perfectly in the infamous three milks (most commonly, whole milk or heavy cream, sweetened condensed milk, and evaporated milk) and topped with strawberries and cream, the folks at Depot Nuevo have it down pat.

There is some mystery surrounding its origins. Mexico, Nicaragua, Guatemala, and even Cuba have claimed to be the birthplace of it, and food historians have cited evidence of the recipe showing up on the backs of evaporated milk and sweetened condensed milk cans in an effort to promote the product. Both types of milk offered manufacturers a way of getting dairy to the public in a more preserved way. And how brilliant a move to encourage folks to make dessert with these fabulous "canned milks"!

I recently came across a great coconut version, received from my good friend and former coworker, Chef S. No one makes pico de gallo like Chef S, so when he posted this mango tres leches cake on Facebook the other day, I knew I had to try it. The funny thing was, I had leftover coconut cake batter from a tried and true recipe I've always used, so I bypassed most of the New York Times cake recipe and made only the three-milk syrup and mango topping from it, using my cake batter for the sponge instead. So the following recipe is a hybrid of sorts--a bit simpler than the original from my friend, as you don't have to separate eggs and incorporate whipped whites separately. A much speedier version!

You can use any fruit topping you'd like, but I did maintain the mango puree in my version. I eliminated the brandy in the three-milk syrup and added Bacardi gold rum while processing the mango puree, which brings a nice-and-tipsy experience to the dessert. Serve this at your next taco party or burrito bash, and I assure you, it'll be polished off!

Coconut Mango Tres Leches Cake (adapted from the New York Times and Sky High: Irresistible Triple-Layer Cakes)

For the Cake

1 3/4 cups sifted cake flour
2 1/4 teaspoons baking powder
1/4 teaspoon salt
3 egg whites
1/4 cup milk
1 teaspoon coconut extract
1 stick (4 oz) unsalted butter, room temperature
1 cup plus 2 tablespoons sugar
1/2 cup unsweetened coconut milk

For the Three-Milk Syrup

1/2 cup milk
1 cup coconut milk
1 can (15 ounces) sweetened condensed milk

For the Topping

1 1/2 cups heavy cream
1/4 cup powdered sugar
1/2 cup slivered or sliced almonds, very lightly toasted
2 cups diced mango
1/4 cup sugar
1 teaspoon vanilla
1/4 cup gold rum


Preheat oven to 350ºF. Coat a 9" x 13" baking pan with cooking spray, line with parchment and spray again.

In a medium bowl, sift together the flour, baking powder, and salt and set aside. In a separate small bowl or glass measure, whisk together the egg whites, milk, and coconut extract. In the bowl of a stand mixer, beat butter and sugar until light and fluffy, about 3 minutes. Add egg white mixture and mix until combined. Add flour mixture alternately with coconut milk in three additions, beginning and ending with flour. Scrape down bowl periodically to ensure incorporation. Spread in prepared pan and bake for 25 minutes or until toothpick inserted comes clean. Set aside and allow to cool while preparing milk syrup.


For three-milk syrup, combine milk, coconut milk, and condensed milk in a small saucepan and whisk until bubbly and steaming. Poke cake with fork all over and pour milk syrup over cake, allowing to soak through. You should be able to use all the syrup. Refrigerate 1 hour or overnight.


To serve, beat heavy cream with powdered sugar until fluffy, about 5 minutes. Spread on top of cake and sprinkle with almonds. Puree mango in food processor or using a hand blender. Pour into small saucepan and add sugar, vanilla, and rum. Heat through until bubbly and sugar is dissolved. Drizzle over cake slices before serving. Makes 18 servings.

June 19, 2012

Cooling Down with Lemon Curd and Yogurt Pops

Today marks the twelfth day of 90-degree weather in Chicago this year. If this is late spring, who knows what summer will bring us!

You can cool off with homemade yogurt ice pops, a tasty treat that can be made at home for dollars less than what's in your grocer's freezer. Try my lemon curd and yogurt pops. You can even layer in fresh berries for a really pretty presentation and fruity kick.

As for pop molds, mine are some fancy schmancy ones given to me as a housewarming gift from Crate & Barrel years ago. The company no longer offers these, but it does currently have this fun set available. There are plenty to choose from, and places you'd never expect to carry such an item do, such as Whole Foods, The Container Store, and Walgreens. You can also always fall back on the trusty Dixie-Cup-covered-in-plastic-wrap-and-stuck-with-a-popsicle stick setup. Whatever works and gets you cooled off faster!

There are numerous cookbooks out there all about ice pops, and I've even given one as a gift before. But I personally like to wing it, sometimes simply pureeing leftover berries or bananas and mixing them in with yogurt and freezing. I'm also a sucker for homemade Jell-O pudding pops, especially that Martian green atrocity, pistachio pudding. My mom used to make Bundt cakes with a package of pistachio pudding in them for an after-school snack, and to this day, I keep a few boxes around for pudding pops or to toss into a pound cake batter.

You can even make yourself a breakfast treat by layering granola or nuts in the pop mold cavities along with a flavored yogurt. When I commuted via train, I used to freeze Yoplait Custard Style yogurt and then eat it on the go as I rode the train into work. But I never thought to add granola to my morning frozen treat until I started making ice pops at home.

I used Meyer lemons when making the following version of lemon curd for my yogurt pops. They happened to be in season when I made the curd and canned it, plus I enjoy the floral scent of Meyer lemons over regular lemons, which takes away some of the standard tartness. This lemon curd recipe can easily become lime curd by substituting similar quantities of lime juice and zest. I used plain nonfat yogurt to avoid any added sugar or fat, since lemon curd already contains sugar, butter, and egg yolks. Additionally, this curd recipe makes a great cupcake, cake, or tart filling. It's even good just spread on buttermilk biscuits for Sunday brunch!

How ever you choose to "pop" it this summer, nothing matches the speed at which you can have a fun frozen treat at your fingertips when making ice pops. We're supposed to get a break in our weather here in Chicago by Thursday, so 'til then, I'll be cooling off with a nice batch of Lemon Curd and Yogurt Ice Pops!

Lemon/Lime Curd (from The Williams-Sonoma Baking Book)


5 large egg yolks, room temperature
1/2 cup granulated sugar
zest of 2 lemons or 3 limes)
1/4 cup lemon or lime juice
6 tbsp unsalted butter

In a heavy saucepan, combine yolks and sugar. Whisk vigorously for 1 minute. Add zest and juice and whisk 1 minute longer. Cook gently over low heat, stirring until thickened, 10-15 minutes. (Do not allow eggs to scramble!) Remove from heat and stir in butter until completely melted and smooth. Allow to cool and then cover tightly with plastic wrap, pressing wrap to surface of curd, and chill 1 hour.

For ice pops: Stir curd vigorously with whisk until smooth. Combine curd and 2 cups plain nonfat yogurt and mix until smooth. Pour into ice pop mold, insert sticks, and freeze 2 hours. To remove, run sides of mold under warm water until pops can be easily removed.


June 12, 2012

Wee Ones Scotch Quail Eggs

Hard-boiled eggs are perhaps the lowest-fat way of enjoying an egg (except for maybe poached). Fried and scrambled sure make breakfast best, but what happens when you take said hard-boiled egg, wrap it in breakfast sausage, roll it in breadcrumbs, and deep fry that sucker to golden brown?

A heart attack maybe?

Scotch eggs are widely known as a delectable pub food, served appetizer-style, with mustard or remoulade. At least that's where I've seen them, on the menus of upper-crust Irish and English pubs around the gastrotown of Chicago. Scotch egg folklore says they originated as portable food for wealthy coach travelers in London, usually made of smaller hens' eggs (once wrapped in sausage and coated in breadcrumbs, today's American large and extra-large eggs would in fact make for a heart attack). They were meant to be made of various leftovers, the typical "poor-man's lunch."

Alternative stories take it all the way back to Indian origins, likening it to a soft fried meaty dumpling called kofta. Whatever's it's birthplace and birthright, it's a mighty tasty treat, and can be enjoyed less calorically.

I tried my hand at making what's known as Wee Ones, when I recently found quail eggs at a gourmet grocery store nearby. Quail eggs are typically more prevalent over the holidays, but when I chanced upon these beautiful babies, I decided to embark on making Wee Ones Scotch Quail Eggs using chicken sausage and a smaller egg. I served them with cheddar ale mustard and ranch dressing, along with a salad of cucumber, tomato, blue cheese, and chopped pecans. Absolutely delicious, and despite the deep frying, smaller eggs and chicken sausage made us feel somewhat better about consuming so much cholesterol at once. I certainly wouldn't make these a monthly menu offering in our house, but for one-time fun, they were truly awesome!

This recipe makes 18, only because the grocery store where I purchased them sold them by the dozen-and-a-half. I've supplied a link to purchase them online in increments of 2 dozen, but check any specialty store in your area. Whole Foods in my area did not have them, so you need to consider a smaller, more specialized gourmet grocery store.

Wee Ones Scotch Quail Eggs (adapted from Scrumptious)

18 quail eggs 
1/2 lb fresh chicken sausage, casings removed
6 fresh sage leaves, very finely minced
the finely grated zest of a lemon
a pinch of cayenne pepper (or more, to taste)
a pinch of allspice (optional)
1/4 teaspoon nutmeg
salt and milled black pepper
2 eggs, lightly beaten
1 cup all-purpose flour
1 cup fine dry breadcrumbs (
Panko crumbs are ideal)
mustard and salad dressing of your choice

Bring a large, deep pot of water to a gentle rolling boil. Place all the eggs in a large metal sieve and immerse it very slowly in the boiling water. Very gently and slowly, tilt the sieve so all the eggs roll out into the boiling water. Boil the eggs for exactly two minutes and 20 seconds (set a timer!). Pour off the boiling water and fill the pot to the brim with cold water from the tap. Leave the pot under a trickling cold tap for 7 minutes, allowing the water to spill over the edges.

Drain the eggs, gently crack the shells and peel them. The shells should come away easily, but if they do not, peel them under cold running water. Pat the eggs dry and set aside.

In a large bowl, combine the sausage, sage, lemon zest, cayenne pepper, allspice, and nutmeg and mix well. Season with salt and pepper. Wrap and refrigerate for 30 minutes.

Divide the sausage meat into 18 equal portions. Roll a portion into a ball, flatten it in the palm of your hand to make a patty and put a cooked quail’s egg on top.  Gently wrap the the meat around the egg to enclose it completely, pinching the mixture to close any gaps. Now roll the ball delicately between your palms to create a pleasing egg shape. Repeat with the remaining eggs.  Put the eggs on a plate, cover with clingfilm and chill again for 30 minutes.


Place the flour on one large plate, the beaten eggs in a small bowl, and the breadcrumbs on the second large plate. Line a final plate with paper towels and set aside. Roll the Scotch eggs in the flour and shake to remove the excess. Dip the eggs in the beaten egg yolk, then roll them gently in the breadcrumbs, patting down gently so that the crumbs stick.  Fill a wok or deep fryer halfway with vegetable to 325ºF. Fry the eggs, four or five at a time, for 4-1/2 minutes, or until crisp and golden brown. Remove and drain on paper-towel-lined plate.

Serve immediately with mustard and dressing of your choice. Serves 6-8.


May 27, 2012

Whoopsie Daisy! Mistake with Marshmallows Makes for Mighty Tasty Treat

I've been making marshmallows since pastry school, and I'm quite proud to say they've always turned out... until last week. When embarking on a new recipe, I used to need to make it as-is the first time through. But I've learned enough about method and ingredients after all this time to futz around with an original recipe and still have it turn out right. Alas, this particular attempt got the better of me when I decided to substitute water for whiskey in making a spiked version of candied bacon marshmallows. I didn't really think alcohol would affect structure and figured it could be substituted wherever water was needed in the process. Unfortunately, I was wrong!

Making marshmallows requires blooming unflavored gelatin in water. Most recipes require water divided, with portion used to bloom the gelatin and another smaller amount later with the simple syrup you make on the stove. I tried it with whiskey in the bloom and water in the simple syrup, and I ended up with a runny, sticky mess I pitched down the garbage disposal. I tried the reverse the second time (saves a bit on whiskey too), and I ended up with more of a marshmallow fluff--usable but not really firm enough to be marshmallows.

Some research on the subject brought me to this site, Gelatin Food Science, which is the ultimate food nerd's answer to all things gelatin. The following statement described my problem to a T: "Competition between gelatin and glucose polymers for water in low water content products can result in, at worst, precipitation of the gelatin and at best a marked loss in gelling properties or hardness of the product."

So I'd robbed my marshmallows of vital water by subbing water for alcohol, which limited the gelling capabilities overall. Bummer! A quick Google search on "marshmallows with alcohol" renders a lot of recipes where the alcohol is just added as a flavor with the vanilla in the end. Point to remember!

Nonetheless, I ended up with a fine batch of marshmallow fluff for making frosting, and the following recipe was born: French Toast Whoopie Pies with Candied Bacon Whiskey Marshmallow Filling. Go ahead... Eat them for breakfast. They were already born from a mistake, so eating dessert first shouldn't really matter!

French Toast Whoopie Pies

2 1/4 cups all-purpose flour
1 1/2 teaspoons baking powder
1 teaspoon baking soda
1/2 teaspoon salt
1 teaspoon cinnamon
1/4 teaspoon nutmeg
1 stick unsalted butter, room temperature
½ cup granulated sugar
½ cup packed light brown sugar
2 large eggs, room temperature
1 teaspoon vanilla extract
½ cup buttermilk

Preheat oven to 375 F. Line two baking sheets with parchment paper.

In a medium bowl, whisk together the flour, baking powder, baking soda, salt, cinnamon, and nutmeg. Set aside.

In the bowl of a stand mixer fitted with the paddle attachment, beat the butter and both sugars on medium speed until light and fluffy, about 3 minutes. Add the eggs, one at a time, and beat until combined. Add the flour mixture in three intervals, alternating with the buttermilk and mix just until combine. Add the vanilla and beat on medium for 2 minutes, until completely combined. Using a small 1-inch cookie scoop, drop the dough onto the prepared baking sheets, leaving about 2 inches of space between cookies. Bake the cookies, one sheet at a time, for 8-10 minutes, or until they are set and just beginning to brown. Let the cookies cool on the baking sheets for 5 minutes before transferring to a wire rack to cool completely. Sandwich together with Candied Bacon Whiskey Marshmallow Filling. Makes 12-15 whoopie pies.

Candied Bacon Whiskey Marshmallow Filling for Whoopie Pies (adapted from Kitchen Konfidence)

Cooking spray
1/2 cup packed light brown sugar
1/2 teaspoon cinnamon, divided (1/4 for bacon, 1/4 for marshmallows)
6 strips all-natural thick-cut bacon
4 1/2 teaspoons unflavored powdered gelatin
1/2 cup cold water
2/3 cup granulated sugar
1/2 cup real maple syrup (not Log Cabin!)
1/4 cup light corn syrup
1/4 cup bourbon or rye whiskey
1/2 teaspoon fine sea salt
1/2 stick (1/4 cup) unsalted butter, room temperature
1 1/2 cups powdered sugar, sifted

Preheat your oven to 350°F and place a rack in the center of the oven. Line a baking sheet with parchment and place an oven-proof baking rack inside it. Coat the rack with cooking spray and set aside.

Stir together light brown sugar and 1/4 teaspoon cinnamon on a plate. Rub each slice of bacon on both sides with cinnamon sugar until evenly coated. Lay strips of bacon on rack on baking sheet. Bake for 30 to 35 minutes until deeply caramelized. Let cool then finely chop.

Combine gelatin and cold water in a small bowl, whisking to combine. Let stand for at least 5 minutes.

In a medium saucepan, combine granulated sugar, maple syrup, corn syrup, whiskey, and sea salt, stirring to combine. Bring to a boil over high heat, stirring occasionally. Clip a candy thermometer or insert a metal probe thermometer into the mixture and continue to boil until it reaches 240°F. (If the mixture starts to bubble up too much, lower the heat.) Remove from heat once the mixture reaches 240°F.

Microwave the gelatin on high for 30 seconds. Pour into the bowl of a stand mixer fitted with the whisk attachment. Whisk on low for a moment then slowly pour in the hot syrup mixture. Beat on high for 10 minutes. Fold in 1/4 teaspoon cinnamon and scoop mixture into plastic container. Seal tightly and refrigerate for up to 1 month.

To make filling for whoopie pies, cream together 1 cup candied bacon whiskey marshmallow fluff and 1/2 stick unsalted butter. Add 1 1/2 cups powdered sugar and mix until stiff and spreadable. Pipe onto whoopie cookies or scoop using 1-inch cookie scoop.


April 16, 2012

Panko-Encrusted Masala Chicken and Chickpea-Cilantro Waffles with Chai Maple Syrup

OK, that's a mouthful to say, isn't it? And I'll have you know, it's a mighty tasty mouthful to enjoy, for breakfast or dinner!

Our house is a breakfast-for-dinner lover's haven, and vice versa. We love having last night's leftovers for this morning's breakfast, and we're talking not just pizza. When I'd visit my relatives in India, very little difference existed between what we'd have for breakfast vs. lunch vs. dinner. A traditional American sweet breakfast (cinnamon rolls, sugary cereals, French toast) is unheard of there, or at least it still was in the '90s when I last visited. With the West's infiltration of India's dining scene (KFCs and McDonald's can now be found in most every major city there), Indians may be getting exposed to the American idea of breakfast. I certainly grew up with the western notion of the first meal of the day, but now that I'm married to the King of Leftovers, I'm placing fewer parameters on when to eat what.

But having grown up in the South (southern Missouri, to be exact), which is influenced by African-American cooking traditions, I knew of the chicken and waffles phenomenon, but I had never known its history. Is it a Southern thing? Is it soul food? A little research took me to this site, which acknowledges a famous eatery in L.A., but really points to a supper club in Harlem as having started it all—a place where the owners wanted to serve late-night patrons a little breakfast and dinner at the same time, while also playing on the African-American tradition of something sweet with a little savory.

How ever it came to be (from the East, West, or South), I have put my own Indian-American spin on this recipe here. This can be made gluten-free, by replacing the half cup of regular all-purpose flour with a gluten-free blend, and/or sugar-free, as the brown sugar is negligible and could be left out. However, you won't get the notable crisp texture of a good waffle without any sugar at all, so I'd keep it in there and cut sugar somewhere else for the day if need be. You can also use this batter as a pancake batter, if you don't have a waffle maker.

Panko-Encrusted Masala Chicken and Chickpea-Cilantro Waffles with Chai Maple Syrup

For the chicken:

1 lb boneless, skinless chicken breasts, rinsed and patted dry
salt and pepper to taste
1 egg white
1 cup panko (Japanese breadcrumbs)
1 teaspoon mild curry powder or garam masala
1 teaspoon ground coriander
1 teaspoon dried parsley or tarragon
1/2 teaspoon garlic powder
1/4 teaspoon Spanish paprika
1/4 teaspoon cayenne


Preheat oven to 375°F. Line a baking sheet with parchment paper and set aside.

Slice chicken breasts into 2-inch pieces. Season with salt and pepper to taste. In shallow bowl, lightly beat egg white. In a separate shallow bowl, combine panko and spices and mix well. Dip chicken chunks in egg white and then panko mixture, making sure to cover pieces well. Place evenly on baking sheet. Bake 17-20 minutes or until tender and cooked through. Serve with waffles and chai maple syrup.

For the waffles:

3/4 cup chickpea flour
1/2 cup all-purpose flour
1 teaspoon baking powder
½ teaspoon baking soda
½ teaspoon sea salt
1 tablespoon dark brown sugar, optional
1 cup buttermilk, room temperature
2 tablespoons butter, melted
2 large eggs, lightly beaten, at room temperature
1/4 cup cilantro, finely chopped

Preheat and lightly grease a waffle maker. In a large bowl, whisk together chickpea flour, all-purpose flour, baking powder, baking soda, sea salt and brown sugar. In a separate bowl or glass measure, combine buttermilk, butter, and eggs, stirring well. Make a well in flour mixture and slowly whisk in buttermilk mixture. Stir in cilantro. Allow to thicken for 20 minutes.

Pour 1/3 cup mixture over each preheated and greased waffle grid (1/4 cup per well if using mini Belgian waffle maker). Close lid and cook until both sides are golden brown. Repeat until all batter is used. Serve with chicken and chai maple syrup. Serves 4-6.

For the syrup:

1 cup maple syrup
2 decaffeinated chai teabags

Heat syrup in a small saucepan over medium heat. Add teabags and bring to a boil, about 5 minutes. Remove from heat, cover, and allow to steep 20 minutes. Serve warm over chicken and waffles.

Note: Chickpea waffles recipe adapted from livingwithout.com.


April 9, 2012

Want Not, Waste Not: Using Up Leftover Ingredients

Don't you just love it when a recipe calls for 1 cup of buttermilk or a 1/2 cup of heavy cream, and you're left with a quite usable portion of an expensive, valuable ingredient and nowhere for it to go?

In a caterer's kitchen, this is a regular state of wonder, especially during what we consider our "slow" season. This is that time between the winter holidays and Easter, when people aren't quite ready to get back on the treat wagon and start chowing down on decadent desserts. Everyone's still into their New Year's workout regimens, and heavy cream isn't even in the average vocabulary at this time of year. I may get an order here, a small delivery there, and in between, I'm left with odd amounts of rich ingredients I just can't bring myself to throw out. And admittedly, I am hard-pressed to throw out any type of ingredient in this economy!

If you're ever in a similar situation, here are some ideas to help make the best use of random leftover ingredients in your kitchen. I've included ideas for the ingredient's main use, followed by something you can make with the leftover amounts.

Heavy Whipping Cream

Main Recipe Uses: Ice cream, custards or whipped topping for pies, chocolate ganache for truffles, thickener for heartier soups or bisques, caramel candy or caramel sauce
Leftover Uses: Homemade mascarpone, butter

No kidding! You can make mascarpone from scratch, which can serve as an indulgent bagel spread, lasagna filling, or cinnamon roll frosting--basically anywhere you'd normally use cream cheese or even ricotta cheese. Follow this tutorial on making your own mascarpone. It requires some time overnight in your fridge before use, so it's not faster than going to the grocery store and purchasing some if you need it, but it is cheaper. Mascarpone can cost upwards of $5 for 8 ounces, so if you have heavy cream on hand from a previous recipe, make it yourself, and you'll taste the difference in your tiramisu. As for butter, Joy the Baker provides a great tutorial with images here. You can even flavor your homemade butter right in your stand mixer or mixing bowl using herbs, honey, jam--you name it!

Buttermilk

Main Recipe Uses: Acidic liquid for cakes, ice cream or sorbet, biscuits or bread
Leftover Uses: Mashed potatoes, waffles or pancake batter, homemade ranch salad dressing

Use leftover buttermilk in place of any liquid (milk, chicken broth) you would normally add when whipping or ricing your mashed potatoes. To use in waffle or pancake batter, you'll want to reduce the baking soda in the recipe by at least a half teaspoon, since buttermilk is acidic as it is. As for homemade ranch salad dressing, which will fast become better tasting to you than store-bought, Eating Well has a tasty recipe I've made with leftover buttermilk for years. It's also a great way to use leftover herbs of which another recipe might have only requested a twig or two.


Tomato Paste

Main Recipe Uses: Pasta and pizza sauce, flavor and color to soups and bisques
Leftover Uses: Homemade ketchup!

How many times have you opened a 6-oz can of tomato paste and used 1 mere tablespoon? Drives you crazy to watch that can grow a fuzz of mold, despite tightly wrapping it, over the next week or so. Try this homemade ketchup recipe, containing vinegar and sugar, which serve as preservatives that can keep mold at bay and more natural flavors in play. Most commercial-grade ketchups contain high-fructose corn syrup or other unnatural sweeteners. Once you start making your own ketchup, it'll be hard to go back to Heinz. This recipe calls for the whole 6-oz can, so if you're using a partially used can of paste, just reduce the additional ingredients accordingly. For example, there are about 5 tablespoons of tomato paste in one 6-oz can, so if you're down a tablespoon. just reduce all the other ingredients in this ketchup recipe by 20%.

Cream Cheese

Main Recipe Uses: Too many to count!
Leftover Uses: Cream cheese frosting, "cooking cream"

I've done my fair share of recipes that call for either only 3 ounces of cream cheese (the tiny, higher-priced package in the dairy case) or half a regular 8-oz brick of cream cheese. Buying the 3-oz package at a higher price-per-ounce doesn't make sense when there are so many additional uses for the leftover 4 or 5 ounces from a regular-size brick. Philadelphia Cream Cheese has gone so far as to create a new product line called Cooking Creme in sweet and savory options. Granted, the recipes on Kraft Foods' site call for a 10-oz tub of their famous Cooking Creme, but in general, if you just want to bring a creamy consistency to an average pasta dish, a few tablespoons of cream cheese makes it happen. Season according to taste; you don't necessarily need Philadelphia's Cooking Creme flavor profiles, especially if that standard pasta dish already has seasonings you've always enjoyed. I like to debunk the food industry's method of making you believe you need to start buying something you've always had around your house in a simpler form. And when all else fails, just throw that half brick into a bowl with a stick of softened butter, a pound of 10x confectioner's sugar, and a teaspoon of vanilla and beat on high until smooth. Voila! You've got cream cheese frosting, which by the spoon, between a couple layers of cake, or atop a cupcake is always a delectable treat!


February 3, 2012

The Big Game

It's almost Super Bowl Sunday, and admittedly, I am so out of it this year, I didn't even know who was playing this year until I heard it on NPR yesterday. This is also a year when I've seen maybe one of the Oscar contenders, and that's about it. Can we say, not getting out and about that much?

Well, at least this weekend gives us all a reason to stay in and on the couch all day Sunday. Except maybe for your grocery run for some good eats. Super Bowl Sunday probably gives us our first chance to indulge since the holidays and getting back onto the workout wagon in January. But it's important not to go way off the deep end because you still want to stay on track for spring.

In this post, I've included a few of our favorite party-timers, and I've managed to cut a wee bit of fat from each. So maybe you can feel somewhat less of a couch tater with these. These are mostly appetizers, with a dessert thrown in there for good measure. Always, you know. ;-)

So enjoy the game, especially the commercials--some of which you can see online already, including the return of Ferris Bueller. Oh yeah.

Buffalo Chicken Dip


2 boneless, skinless chicken breasts or 4 boneless, skinless chicken thighs
1 cup diced celery (about 2-3 stalks)
1 cup Frank’s Red Hot hot sauce
1 8-oz package light cream cheese, softened
1 cup light ranch dressing or blue cheese dressing

Place chicken in a medium saucepan and cover with water. Poach chicken in water 10-12 minutes over low heat. Cover to simmer and cook. Drain and shred chicken. In a separate bowl, mix chicken and celery with hot sauce until completely combined. Cover and refrigerate 1 hour to marinate. 

Preheat oven to 350°F. Coat a 9" x 9" baking dish with cooking spray and set aside. In a saucepan over low heat, melt cream cheese and ranch. Whisk until smooth (be careful not to burn). Add chicken mixture and mix until completely combined. Spread in 9 x 9 baking dish and bake at for 20 minutes or until heated through. Serve hot or warm with Fritos Scoops (or another hearty chip that can stand up to thick dips). 

Hot Spinach Artichoke Dip

1 8-oz package light cream cheese, softened
1 container light Alfredo sauce (such as Buitoni, found in the refrigerated section)
3 cloves garlic, minced
1 tablespoon Italian seasoning
1 teaspoon salt
1/4 teaspoon cracked black pepper
1 package frozen spinach (10-oz box), thawed and drained
1 cup marinated artichokes, drained and chopped
1 15-oz can petite diced tomatoes with garlic and olive oil, drained
2 cups shredded Italian part-skim four-cheese blend (mix of mozzarella and parmesan at minimum), divided

Preheat oven to 375°F. Coat a 9" x 9" baking dish with cooking spray and set aside. Combine cream cheese and Alfredo sauce until thoroughly mixed (use electric mixer if possible). Add garlic, Italian seasoning, salt, and pepper. Mix in vegetables and stir until completely combined. Add 1-1/2 cups cheese and mix thoroughly. Spread in baking dish and top with remaining cheese. Bake 30 minutes or until bubbly and slightly browned on top. Serve with pita or tortilla chips, or sliced baguette.


2 cups all-purpose flour
3/4 teaspoon baking powder
1/2 teaspoon baking soda
1/2 teaspoon salt
1 cup (2 sticks) unsalted butter, room temperature
1 1/2 cups packed light brown sugar
1/2 cup sugar
2 large eggs, room temperature
1 teaspoon vanilla extract
1 cup chocolate chips
1 cup butterscotch chips
1 cup coarsely chopped walnuts

Preheat the oven to 325°F. Spray an 9” x 13” baking pan with cooking spray. Line with parchment. Spray parchment and set aside.

Sift together the flour, baking powder, baking soda, and salt. In a large bowl, beat butter on medium speed until smooth and creamy. Add both sugars and beat for another 3 minutes. Add the eggs, one by one, beating well after each addition. Mix in vanilla.

Reduce mixer speed to low and add flour mixture, mixing just until combined. Using a rubber spatula, stir in chips and nuts. Scrape batter into pan and use spatula to spread evenly over top

Bake for 40 minutes or until golden brown. The blondies should pull away from the sides of the pan just a little. Cool 15 minutes before serving. Makes 32 (2” x 11/2”) bars.

January 22, 2012

'Tis the Year of the Dragon


January 23 is Chinese New Year. Time to celebrate the Year of the Dragon, a sign of good fortune and great power. Anyone born this year should be honored and respected. So how about doing that with a nice dim-sum-oriented spread?
 
To me, potstickers are a Far East comfort food. There's something about a pair of chopsticks, a chubby dumpling, and some sweet and salty dipping sauce. I really enjoy some crunchy crab rangoon for starters when getting Chinese take-out, but I know everyone can go without the fried-food calories this time of year. I've revamped a longtime recipe in my arsenal to be baked in phyllo dough instead of using wonton wrappers and frying them. And who doesn't love a little oriental-inspired dessert? Matcha (green tea) latte chocolate chip cupcakes with Chinese five-spice fudge frosting wrap up your trip on the Oriental Express nicely. So go on, celebrate the Year of the Dragon with a little honor and respect to the ultimate of Chinese comfort food gods!

Chinese Potstickers (adapted from Cooking Light)

For the dumplings:
3 cups chopped napa (Chinese) or savoy cabbage (about 4 ounces)
4 dried shiitake mushrooms (about 1 1/2 ounces
1/4 cup finely chopped green onions
2 tablespoons plus 1 teaspoon cornstarch, divided
1 1/2 teaspoons minced peeled fresh ginger
1 teaspoon sugar
1 1/2 teaspoons oyster sauce
1/8 teaspoon white pepper
5 ounces lean ground pork
5 ounces ground chicken breast
1 large egg white
48 gyoza skins
1/4 cup canola oil, divided
1 1/3 cups water, divided
 
For the sauce:
1 teaspoon ground ginger
2 tablespoons minced green onions
1/3 low-sodium soy sauce
3 tablespoons balsamic vinegar
2 tablespoons dry sherry
2 teaspoons oyster sauce
2 teaspoons chile puree with garlic sauce, such as Sambal Olek
2 teaspoons dark sesame oil
 
To prepare dumplings, cook cabbage in boiling water 1 minute or until tender. Drain and rinse with cold water; drain. Cool; chop.

Place mushrooms in a small bowl; cover with boiling water. Cover and let stand 30 minutes or until tender. Drain mushrooms; chop.
 
Combine cabbage, mushrooms, 1/4 cup green onions, 2 tablespoons cornstarch, and next 7 ingredients (through egg white) in a large bowl. Cover and refrigerate 4 hours.

Working with 1 gyoza skin at a time (cover remaining gyoza skins to prevent drying), spoon 2 teaspoons pork mixture into center of each skin. Moisten edges of gyoza skin with water. Fold in half, pinching edges together to seal. Place dumpling, seam side up, on a baking sheet sprinkled with remaining 1 teaspoon cornstarch (cover loosely with a towel to prevent drying). Repeat procedure with remaining gyoza skins and filling.

Heat 1 tablespoon canola oil in a large nonstick skillet over medium-high heat. Add 12 dumplings to pan; cook 3 minutes. Add 1/3 cup water. Reduce heat, and simmer 3 minutes or until water evaporates. Repeat procedure with remaining canola oil, dumplings, and water.

To prepare the sauce, combine all ingredients in a small bowl. Serve sauce with dumplings. You can also use prepared Gyoza Sauce or Ponzu Dipping Sauce found in your grocer's international foods aisle. Yields 16 servings (serving size: 3 dumplings and about 1 tablespoon sauce)

Phyllo Crab Rangoon (adapted from the kitchen of L. Peters)

1 8-oz packages) light cream cheese, room temperature
1 can (6 oz) lump crabmeat, drained
1/4 teaspoon salt
1 teaspoon garlic powder
1 teaspoon onion powder
cooking spray or melted butter (depending on how many calories you want to save!)
1 roll phyllo dough (from a 2-roll package), thawed

Combine the cream cheese and crabmeat and mix until smooth. Add salt, garlic, and onion powder. Unroll phyllo dough and follow this tutorial if you've never made phyllo triangles before. Place triangles on parchment-lined cookie sheet and bake at 350 for 15 minutes or until golden brown. Allow to cool 5 minutes before serving. Serve with sweet and sour sauce or soy sauce. Makes 24 appetizers.

Green Tea Latte Chocolate Chip Cupcakes

1 1/3 cups all-purpose flour
1 teaspoon baking powder
1/4 teaspoon salt
8 tablespoons (1 stick) butter, room temperature
1 cup sugar

1/4 cup Trader Joe's Matcha Latte Mix 
2 eggs, room temperature
1/2 cup milk, room temperature
1/2 teaspoon almond extract 

2-3 drops green food color
3/4 cup mini chocolate chips

Preheat oven to 350°F. Line two 12-cup muffin tins with about 15 cupcake liners and set aside.

In a medium bowl, sift first four ingredients together and set aside. In a large bowl, cream butter, sugar, and latte mix together with an electric mixer until light and fluffy, about 3 minutes. Add eggs, one at a time, and mix well each time. Add dry ingredients alternately with milk in four additions (flour, milk, flour, milk) and mix until virtually no lumps (about 3-5 minutes). Add almond extract and 2-3 drops of food color. Stir to combine. Divide evenly in lined cupcake pan (no more than 2/3 full) and bake 16-18 minutes until golden or toothpick comes clean. Cool completely before frosting. Makes 12-15 cupcakes.

Chinese Five-Spice Chocolate Buttercream

3 3/4 cups (1 lb) powdered sugar, sifted
1/2 cup unsweetened cocoa
1 teaspoon Chinese Five-Spice Powder (pre-ground McCormick and Penzey's brands also available)
1/2 cup (1 stick) butter, room temperature
4 tablespoons milk
1 teaspoon vanilla

In a medium bowl, sift together sugar and cocoa; set aside. In a large bowl, beat butter with electric mixer until light and fluffy. Add powdered sugar, cocoa, and five-spice powder and mix to combine. Add milk and vanilla and continue beating until creamy. If desired, add more milk until frosting is spreading consistency. Fill a pastry bag with a large star tip and pipe on top of cupcakes or use small spatula and spread on desired amount. For a cute fortune cookie cupcake topper, follow this link.

January 2, 2012

Champagne Wishes and Sorbet Dreams

Ah, the new year... A chance to purge the old and bring in the new. Typical vows to get in shape, quit eating sweets, and cook healthier meals. But if you have to break those resolutions at all, and you can at least make it to Valentine's Day before doing that, these treats will be worth veering off that path and onto a pink-treat one: pink champagne cake and raspberry prosecco (rosé) sorbet.

I love rosés, especially champagne or sparkling rosés--good, dry cavas, proseccos, and bruts. Rosé is usually considered a summer drink, but it rears its beautiful blush head this time of year in sparkling format everywhere. For these two recipes, made this past weekend to celebrate ringing in 2012, I used Gruet Brut Rosé ($15.99 at Whole Foods). We had this a few years ago for NYE dinner out on the town, and it really fits the bill. Don't cheapen out when baking with champagne. It's well worth getting the good stuff, since alcohol notoriously bakes off in the process. And although the sorbet recipe calls for prosecco, I went ahead and used more brut rosé, since it's what I had on hand for the cake, and it definitely made both dishes. Plus, by using some for the cake and some for the sorbet, it leaves you with just enough to enjoy a glass while baking! ;-)

Rosé Champagne Layer Cake (adapted from The Boozy Baker by Lucy Baker)

2 1/2 cups all-purpose flour
2 cups cake flour
4 teaspoons baking powder
1/2 teaspoon salt
2 1/2 sticks unsalted butter, room temperature
2 cups granulated cane sugar
6 large egg whites
2 large whole eggs
1 1/3 cups brut rosé

Preheat oven to 350°F. Butter or spray with baking spray three 9-inch round layer cake pans. Line with parchment circles and butter/spray again. Dust with flour and tap out excess.

In a medium bowl, sift together flours, baking powder, and salt. In the bowl of a stand mixer, beat the butter and sugar until light and fluffy, about 2 minutes. Add egg whites and eggs and beat until smooth, about another 2 minutes. Alternately add the flour mixture with the rosé, beginning and ending with the flour mixture, beating well after each addition.

Divide batter evenly among prepared cake pans. (I used about 2 1/2 cups of batter per pan and then had extra batter for some cupcakes.) Bake 28-30 minutes, or until toothpick inserted into the center comes out clean.

Cool cakes for 15 minutes in their pans, and then remove them and allow to cool completely on wire rack before filling and frosting. Fill with cream cheese frosting, mixed with 2 tablespoons pink sanding sugar and 2 tablespoons strawberry vanilla sugar, and frost with Swiss meringue buttercream (plus a few drops of pink food coloring). I also used India Tree Oyster Pearls along with plain vanilla buttercream for piping the decor on top and down the sides, for a "bubbly" effect.

Makes one three-layer 9-inch cake (12-15 servings) plus about a half dozen cupcakes, or one three-layer 10-inch cake (20-24 servings) with no extra batter. Serve at room temperature with raspberry rosé sorbet.

Raspberry Rosé Sorbet (adapted from The Craft of Baking by Karen DeMasco and Mindy Fox)

1/2 cups fresh raspberries
1 cup plus 3 tablespoons sugar
3/4 cup water plus 1 1/2 cups water
1 1/2 cups prosecco or rosé

Gently mash together raspberries and 3 tablespoons of sugar in a bowl to macerate. Cover and let stand at room temperature for 1 hour or refrigerate overnight.

In a small saucepan, combine the remaining 1 cup sugar with 3/4 cup water. Bring to a boil, whisking to dissolve the sugar. (You are making a simple syrup.) Transfer syrup to a bowl and refrigerate until cold, about 1 hour.

Scrape the raspberries and their juice into a blender, add 1 1/2 cups cold water, and purée until smooth. Strain through a fine-mesh sieve into a bowl, pressing the purée with a spatula to extract as much liquid as possible. You should have about 3 cups of raspberry purée. Discard seeds. Add sugar syrup and prosecco or rosé to purée and stir to combine.

Freeze in an ice cream maker according to manufacturer's directions. Due to the alcohol, it may still be slushy after churning. Transfer sorbet to an airtight container and freeze until ready to serve. Makes 1 quart.