May 31, 2011

The Big O

Oprah, that is... The curtain's been called, the lights are out, and she's probably relaxing poolside at her mansion in California by now, but I managed to get my foot in that door before it closed by landing a spot on a baking team for one of the final shows.

For William and Kate's wedding, Oprah hosted a royal tea party, where crumpets, cookies, and William's favorite chocolate cake were served. Chef Darren McGrady, Diana's personal chef since her wedding to Charles until her death, came to town, courtesy of Oprah's peeps, and through a few highly valued connections, I got to work with him to make all the menu items for the show. My pictures from the two-day experience don't do it all justice (and unfortunately, neither did the actual episode, where he hardly got any face time with Oprah and our goods were hardly glimpsed by viewers), but as they always say, the experience is what counts. Chef Darren was so charming and full of fun stories cooking for the Queen, Queen Mum, Diana, and the boys. It was a great experience, and I think I made some connections for a lifetime. That's "The Word" in this business of who you know and how you know them!

Check out our Flickr roll for more pictures from these day(s) of thunder!

April 20, 2011

Breakfast of Champions!

No, not Wheaties, but something better... Stuff that really sticks to your ribs and keeps you going until lunch. We're talking the types of breakfast foods that really truly help you get a good workout regimen going this spring and can help maintain that diet when you're back in shape.

Most manufactured cereal brands contain that dreaded HFCS anyway, so you want to really avoid those at all costs, especially when you're working out and trying to lose weight. As you can tell from our absence in Cyberspace, we were kind of fresh out of blog ideas at Spoonfoolery until I posted recently on our Facebook page, asking fans what they'd like to know. I got a resounding request for breakfast food. So here goes...

Granola and yogurt are two of the best things you can do for your body to kickstart the day. You've got protein and calcium in the yogurt, along with fruit and fiber in the granola. Most manufactured granola brands are high in fat and sugar. Try this one on for size. I've been making Cooking Light's Maple Almond Granola for years, and we love it every which by loose... In a bowl with milk, mixed in with yogurt, even sprinkled on top of ice cream! (You know, to make dessert worth something more than it really is!) I mix it up a bit each time too, using the following interesting combinations to replace the recipe's existing fruit/nut combination:

*pecans and dried cherries
*pistachios and dried cranberries
*walnuts and unsweetened banana chips
*cashews, unsweetened coconut, and dried pineapple or mango

For something you can grab and go, try the Hearty Breakfast Cookies at CDKitchen. I make them with whole wheat flour, add nuts (any kind), and even chopped cooked bacon or diced ham (if you buy prepackaged diced ham, drain in paper-towel-lined bowl overnight in your refrigerator before adding to cookie dough). These have become an integral part of our Healthy Snack lineup at the youth center where I teach, an endeavor that requires us to stay within the guidelines of a reduced sugar and fat after-school snack. And by the way, try and avoid margarine in actual baked product of any kind (this recipe suggests it, but I never use it). It contains too much water and wreaks havoc on the structure, is not as flavorful as butter, and don't even get me started on the whole trans fat thing!

Last but not least, here's a recent find that I unearthed during the last zucchini season: Low-Fat Chocolate Zucchini Muffins. These can almost pass as a cupcake, they're so rich and moist, but you're getting the power-packing benefit of a green vegetable in there, so you can feel good about the fact that you're feeding your family a chocolate muffin for breakfast! I've tried several of the mix-ins people mention, like chocolate chips (well, when you're a pastry chef, sometimes you just can't suppress your devilish nature), nuts, and even applesauce to replace the oil. All renditions turn out fine, and this recipe can be poured into a loaf pan and made into a zucchini bread as well.

There's no reason breakfast has to be boring. Be a champion, a baking champion, and make it from scratch your way, every day!

February 25, 2011

Rolling Out the Red Velvet

Valentine's Day brings out all things pink and red, including everyone's lust for that indelible favorite, red velvet cake. I'm not sure what it is about it that everyone loves (with anywhere from only 2 tablespoons to maybe 1/3 of a cup of unsweetened cocoa, it's not really chocolate, but then it's not really just vanilla with red food color either), but secretly, I think it's the color plus the cream cheese frosting.

Everyone loves cream cheese frosting! It goes well with carrot cake, devil's food, lemon, and of course, red velvet. With wedding cakes, I encourage brides to go with a white chocolate or cream cheese filling so that guests can still get a little "alternative flavor" kick along with the standard wedding vanilla buttercream.

But at this time of year, you might even want to go for an alternative item on the red velvet spectrum. How about red velvet doughnuts? I pulled a recipe off Gourmet Live recently, but after some rather interesting results at home, I revamped it a bit to come up with the one below. The first few attempts were too airy and fluffy--much like a cupcake in a circle, if anything else. A good cake doughnut should be soft and melt-in-your-mouth tasty, like a good cupcake, but it also needs to be dense, buttery, and eat like a meal, like a hearty doughnut should! I played around with the egg and butter ratios, replaced the flour with cake flour for tenderness, and added a cream cheese glaze, and voila! Here's a little something you can roll out the next time you have overnight company. (But they may not want to leave, so beware the extended stay!)

Baked Red Velvet Donuts
2 cups sifted cake flour
2 teaspoons baking powder
1 teaspoon baking soda
1/2 teaspoon salt
1 cup sugar
2 large eggs
1/2 cup (1 stick) butter
2 ounces unsweetened chocolate
3/4 cup buttermilk
1 1/2 teaspoons vanilla extract
1 tablespoon red food coloring

Preheat the oven to 350°F. Spray a doughnut pan with cooking spray with flour in it, or butter it with pastry brush and flour it.

In a large bowl, sift together cake flour, baking powder, baking soda, and salt and set aside.

In the microwave in a small heat-proof bowl, heat butter and chocolate together on 50% power in 1-minute intervals until melted. DO NOT ALLOW TO BURN. Stir until smooth. Set aside to cool.

In another bowl, whisk together the sugar and eggs. Add the melted butter/chocolate mixture to the egg/sugar mixture. In a glass measuring cup, whisk buttermilk, extract, and food color until combined. Add to egg/sugar mixture and stir well.

Gradually add the dry ingredients to the wet mixture in three intervals, mixing with a spatula each time just until combined. Using two spoons or a pastry bag fitted with a 1/2-inch wide tip, fill the doughnut pan with the batter, filling each cavity about two-thirds full. Bake in the preheated oven for 12-15 minutes.

Cream Cheese Glaze

1/2 package cream cheese (4 ounces), room temperature
1/4 cup butter, room temperature
1 1/2 cups powdered sugar, sifted
1/4 teaspoon salt
1 teaspoon vanilla extract
1/2 cup milk, room temperature

In small bowl, using electric mixer, blend cream cheese and butter until combined. Add
powdered sugar, salt, and vanilla extract and mix well until no lumps. Add milk and mix until smooth and a little drippy. Add more milk if you like a thinner glaze. Spread on doughnuts while warm and let glaze drip over sides. Makes about 1 dozen.

February 16, 2011

A Chili for the Chilly

February. The dead of winter. Cold and gray. Outside of the Super Bowl and impatiently waiting on spring to arrive, with little else to look forward to, it’s a great time to add some spice to the trials and tribulations of everyday life.

You’re probably thinking, “All right, already, King… Get to the point!”

Chili is the point. In this long overdue rendition of a recipe, the Burger King shares a legendary version of everybody’s favorite winter fill.

1 lb. 96% extra lean ground beef
1 jalapeno pepper, seeded and finely chopped
1 green bell pepper, seeded and roughly chopped
1 red bell pepper, seeded and roughly chopped
2 garlic cloves, peeled and finely chopped
1 small white onion, thinly sliced
4 medium tomatoes, roughly chopped, seeds and juices discarded
1 can red kidney beans (15.5 oz)
1 can black beans (15.5 oz)1 jar plain marinara sauce (16 oz)
2 cans tomato sauce (15.5 oz each)
about half a white chocolate bar (about 2 oz)
1/4 cup of buffalo sauce (such as Frank's RedHot)
Spices: cinnamon, black pepper, brown sugar, sea salt, cumin, coriander, cayenne pepper

In a large pan over medium-high heat, brown beef, breaking it up as you move it from the container to the pan. As it begins to brown, add 1/2 teaspoon of each: cinnamon, black pepper, and brown sugar. This will take about 10 minutes.

While beef is cooking, prepare vegetables, garlic, and onion as noted above. Add these ingredients to the beef, along with some sea salt to taste, and continue cooking another five minutes, or until the peppers have become tender.

As this mixture cooks, chop the four tomatoes, discarding the seeds and juices, and drain and rinse both cans of beans. Add tomatoes, beans, marinara sauce, and tomato sauce, as well as 1 heaping teaspoon ground cumin, 1/2 teaspoon ground coriander, about a half of one white chocolate candy bar, and 1/4 cup buffalo hot sauce. Stir ingredients well to combine and reduce heat, adding a few of pinches of cayenne pepper to taste.

His Highness suggests letting the chili simmer for about two hours, which brings out the creamy, sweet notes of the brown sugar and white chocolate, along with the kick of the cayenne and buffalo sauce — a unique, yet delicious contrast.

Although the recipe has some quirks, it’s one that has been through many tweaks and variations by this hardcore chili hound. And, most importantly, it’s the best one I’ve had the pleasure of coming across.

February 1, 2011

For Perfect Roast Chicken, Get Yourself a Brick

The next must-have kitchen gadget isn't at Sur La Table or Williams-Sonoma. It's at Home Depot.

This isn't to deny my affection for fancy kitchen implements. The only way you'd take away my Le Creuset Dutch oven is from my cold, dead hands! But I must confess my adoration of the humble brick. I owe it my gratitude for its role in helping make the most flavorful and moist roast chicken I have ever made.

I take roast chicken seriously. There's perhaps no better test of a cook to get it right. It's simple, but not easy. Two things usually foul (fowl?) up roast chicken. The first is insufficiently brown, or worse, rubbery skin. A more glaring fault is dry, stringy breast meat. That's because chicken breasts, like those of other birds, cook more quickly than the legs and thighs. By the time the latter cook completely, the former too often have entered shoe leather territory.

A brick (and pair of sturdy scissors) address these shortcomings. You'll need the scissors, or a sharp knife, to remove the chicken's backbone—an easy feat that will take no more than 1 minute—so that it lays open like a book. The brick forces the chicken flat, ensuring even cooking. In 45-50 minutes—much less time than conventional roasting techniques—you'll pull a perfectly cooked bird from the oven, with the requisite crisp, golden skin to match.

A note about the chicken itself: I highly recommend the Empire kosher brand, which I find at Trader Joe's. I won't pretend to be an expert on kosher slaughter techniques, but I know the process involves salting the meat, a practice that boosts flavor and helps the chicken retain moisture. (You can achieve the same effect by soaking your chicken in cold salted water, a procedure known as brining. Click here for a primer.) I give the chicken an added boost with a marinade of equal parts lemon and olive oil and fresh herbs. Rosemary and thyme are classic chicken-friendly herbs, but tarragon would pair nicely too.

Below you'll find a step-by-step guide to chicken under a brick, or as the Italians call it, chicken al mattone. (It always sounds better in Italian, doesn’t it?)

First, turn the chicken breast down, and with a sturdy pair of scissors, cut along one side of the back bone. Cut from one side to the other. Repeat on the other side of the backbone. The bone will be your guide. (When you attempt this maneuver, you'll see what I mean.)


Next, flatten the chicken with the palm of your hand as if you were mistreating a book. Rub the marinade on the front and back of the chicken. I prefer an all-day marinade, but an hour or two will do in a pinch. Any longer, though, would be a bad idea. The lemon juice may start "cooking" the chicken.


Preheat the oven to 425 degrees F. In an oven-proof frying pan, saute the chicken, breast side down, in a couple tablespoons hot olive oil for approximately 7 minutes. The chicken should be well-browned.


Wrap the brick in foil (see below) and set it atop the chicken, with the chicken remaining breast side down. This will ensure even cooking and perfectly browned skin. Insert pan in oven and roast for 30 minutes. (When my chicken is on the smaller side, around three pounds, I usually roast it for a little less, around 27 minutes.)


Remove the brick and carefully turn the chicken so that it's breast side up. Return to the oven for another 10-15 minutes. (After 10 minutes, I check to see if the chicken is done. Some fancy-pants cooks might advocate use of a thermometer. I prick the leg or thigh with a fork, and if the juices run clear, it's done.)


It's important to let the chicken rest for at least 10 minutes after roasting. As tempting as it looks, resist the temptation to carve into it. Its juices will end up on the cutting board rather than in your mouth. Loosely cover it with foil to keep it warm.


When you're ready to eat, you'll find it easy to cut into serving pieces. I love to serve roasted chicken with crusty bread and white beans, briefly sauteed in olive oil and rosemary. I'll also braise a hearty green, such as kale or Swiss chard, in olive oil and garlic. All complement the simplicity of the chicken so elegantly.


The last step is optional, though highly recommended: This dish, like any meal, is best enjoyed with special company. In this case, it was my equally zesty boyfriend, who just loves this dish.

January 21, 2011

Choux, Choux, Kachoo!

People have often asked me what the next big thing in pastry will be, especially after this crazy cupcake ride we've been on for some time now. For years (and I am not saying this because they seem in fact to be the next big thing), I've been saying it'll be the whoopie pie. Bon Appetit in fact did a feature on this recently, pitting the whoopie pie against the French macaron and having readers vote on which would be the Next Big Thing.

However, I daresay at this point, the cream puff may very well be giving all these sweet treats a run for their money. Cream puff patisseries like Beard Papa's are opening up everywhere, and the lines are out the door! And profiteroles (see the difference between cream puffs and profiteroles here) are appearing on dessert menus in everyday cafes from here to D.C. This holiday season, I catered dessert for a party where the centerpiece was a good old-fashioned French croquembouche.

I recently ventured over to Beard Papa's here in Chicago's Loop to investigate this puff proliferation. Theirs are some seriously large Marges, I must say, and I think French chefs everywhere would balk at the size of these things. Cream puffs, or chouquettes, are true petit fours and should be consumed, by definition, in one or two bites. So the fact that Beard Papa's are like burger buns is a little disconcerting to the average French pastry chef, but at least it makes them good for sharing. I got the standard "eclair" (another thing I had issue with--eclairs are the long "hot-dog-bun-like" puffs; chouquettes are the round, more "meatball-looking" puffs), which was coated in a rather hard chocolate shell for some weird reason. Since Beard Papa's version is neither round and meatball-looking, nor is it long and hot-dog-bun-like, I guess they can call it whatever they want! They are more or less bumpy and hilly, but generous in portion and nice and airy inside. I had some problems with the hard chocolate shell business. That is not at all the way it's done in France. Most typical French-style cream puffs and eclairs have a smooth, thick ganache glaze over the top that's soft and nice and drippy upon biting into them. But I will give BP some kudos on the strawberries-and-cream filling. Yum! Nice touch to add the fresh strawberries to the cream!

The other cool thing about BP is the "Chipotle-style" ordering system. You decide how many you want (single or various multipacks), order your puff (naked or chocolate shell), order your filling, and voila! It's filled fresh right there in front of you, so you're not getting some soggy, day-long-filled blob. It is a low-cost/high-return venture for these folks, so talk about a winning business plan!

Believe it or not though, these are very easy to make at home, and so you should save yourself the bucks and try whipping up a batch. Ina Garten's choux paste (cream puff batter) recipe is ridiculously easy and five-star review on Food Network's site, so you just can't go wrong with it. Use real whipping cream for your filling (no cheating and using that heart-attack-in-a-bowl Cool Whip crap). And when it warms up again, you can make them profiteroles and serve them with ice cream!

December 19, 2010

Cookie Swap!

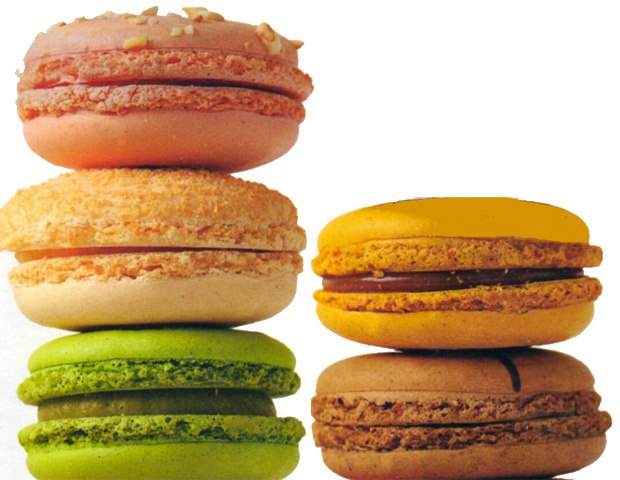
It's that time of year... Cookie Monsters everywhere are baking up a storm, filling pretty tins with delectables, and delivering them near and far. This year, I tested a few new recipes and found some real winners, including getting my French macaron game on again. I hadn't tackled that fussy little task since pastry school and was worried I'd forgotten the how-to, but it all came back to me, and now I'm having a hey-day with them. A macaron obsession, if you will, thinking about all the unending possibilities of flavor combinations! Here are some solid staples you might want to try in these last days of baking before Christmas...

Fine Cooking's Orange Butter Cookies with Grand Marnier Glaze: Soft, buttery orangey cookie with a tasty even-orangey-er glaze! You can substitute Triple Sec for Grand Mariner to cut costs. The flavor effect is about the same. The butter cookie recipe is also a great basic roll-out recipe for any other flavoring, including lemon or lime. The use of yolks instead of the whole egg give the dough a nice, pliable feel and a golden color.

Chocolate Caramel Bars from Martha Stewart: If you're not planning to transport them elsewhere for presentation, follow the recipe and make them in bar format. Use a hot, wet knife to make clean cuts, and definitely make sure you leave extra parchment hanging over the pan's edges in order to pull it out of the pan and lay it flat on your cutting board. However, if you do want a neater, cleaner presentation, this filling works great in small tart shells or between two butter cookies. You could use the Fine Cooking recipe above, but leave out all the orange flavoring (or keep it, if you go for that chocolate-orange zest appeal!).  One note of caution though... Martha's editors fail to tell you how to caramelize sugar for real. The extra water in this recipe wreaks significant havoc on the caramelizing process, I must say. This online tutorial on caramelizing sugar without water is excellent and will give you the confidence to make caramel any ol' time!

Nielsen-Massey's Chocolate Chip Cookies: This recipe is absolute perfection time and time again. It doesn't matter the mixer, the oven, the altitude, the humidity, whatever... They are perfectly soft and chewy in the center and crispy around the outside. I actually leave out the cream of tartar. This description gives you the reasons for cream of tartar in recipes, but quite honestly, I don't know the purpose of it in this one, as it already contains baking powder, which is a sufficient enough form of acid for baking cookies. Nonetheless, people will devour these and may be clamoring for more, so it's a good thing the initial recipe makes 4 dozen!

French Macarons, also from Martha: Exceptionally fussy if you don't have a good flour sifter (which I don't), and are forced to use a sieve, (which I am!), but well worth the effort in the end. There is definitely a macaron craze going on in this dessert-lovin' nation of ours right now, right down to entire bakeshops opening up simply to sell macarons. I was out of practice when I tackled these this week, but they came out totally perfect using Martha's recipe. The variations this recipe includes are also nice, especially the pistachio. Make sure you purchase ready-made almond flour though, and if you decide to grind your own, don't use blanched silvered almonds. Something about their initial structure does not make a true finely ground flour. Somewhere on Martha's site, I read that if you grind your own, you should use blanched sliced almonds. Considering I have a caveperson's sifter (don't ask; totally useless gadget in my kitchen, start to finish) and otherwise have to use a small sieve, I really couldn't fathom adding that extra step for myself, so I purchased almond flour from Whole Foods (Bob's Red Mill brand) for $12.99/lb, which is rather steep. I later found it at Nuts Online in much cheaper 1-lb and 5-lb packages. A little goes a long way though, as you can get about 2 dozen macarons out of less than a cup of almond flour. All that said though, what is really at stake with making macarons is your technique. Follow this recipe carefully, and you'll do just fine. I Love Macarons, a cute little primer on this ever-precious treat, also details what can go wrong and why, lots and lots of flavor combinations, and some great recipes for fillings.

The Essential Chewy Sugar Cookie from my good friend HD: You'll want to eat five in one sitting, I'm sure of it! These are so perfect, so chewy, so buttery, not too sugary, and just an all-around easy-peasy recipe to make, there's no reason to not do this one this year! You'll note in the recipe that it does not use the standard creaming method for making cookies but asks for more of a dump-it-all-in-and-finish-with-flour format. It works though, so give it a whirl. My fifth-graders even made them at the youth center where I teach, and everyone in the kitchen was clamoring for a few. Bake some tonight--it's the perfect lunchbox treat for this last week before the holiday rush!

Essential Chewy Sugar Cookie


3/4 cup (12 tablespoons) unsalted butter
3/4 cup granulated sugar
1/2 cup light brown sugar
1/4 cup light corn syrup
2 teaspoons vanilla extract
1/4 teaspoon nutmeg or lemon oil (optional)
1 1/2 teaspoon baking powder 
1/2 teaspoon baking soda
1/2 teaspoon salt
1 large egg
2 1/2 cups unbleached all-purpose flour
1/4 cup coarse or granulated sanding sugar for coating

Preheat oven to 375°F degrees. Line baking sheets with Silpat or parchment paper.

In a large mixing bowl, beat together the butter, granulated and brown sugars, corn syrup, vanilla, nutmeg, baking powder, baking soda, salt, and egg. Stir in the flour.

Place the course sugar in a shallow dish. Drop the dough by tablespoonful into the sugar, rolling the balls to coat them. Place on prepared baking sheets and bake for 10 minutes, or until the edges are just barely beginning to brown (Note: They will look soft; if you bake these cookies too long, they’ll be crunchy and not chewy.)

Remove them from the oven and cool on the baking sheet for 5 minutes, then transfer them to a rack to cool completely. Makes 3 dozen.